
Roundtripping Final Cut 10.4.5 and DaVinci Resolve 15 - Part 1

As many of you know, DaVinci Resolve is a powerful video application that is currently the industry standard for color grading. It is a powerful tool, if you know how to use it correctly.
If you’ve never used Resolve before, go ahead and download it from Black Magic's website. The free version contains almost all the features included in the paid version, and, in addition to being excellent software for color grading, is a superb NLE available totally free of cost.
Today we’ll be looking at the most efficient way to send your project from Final Cut 10.4 to DaVinci Resolve 15 for color grading. The first step is to export your project as an FCPXML
Exporting a Final Cut Pro XML (FCPXML)
FCPXML is Apple’s proprietary interchange format, and the only option FCPX gives us. Fortunately, it does an excellent job of sending projects to Resolve. FCPXML is also supported by Premiere, but not by most other NLEs.
PRO TIP: If you need to send a timeline from FCPX to another NLE that doesn’t support importing FCPXML, Resolve is a free and efficient way to do so. Just import the FCPXML into Resolve, then go to File > Export AAF, XML… and export an AAF. This also works in the opposite direction to import a project from another NLE into FCPX
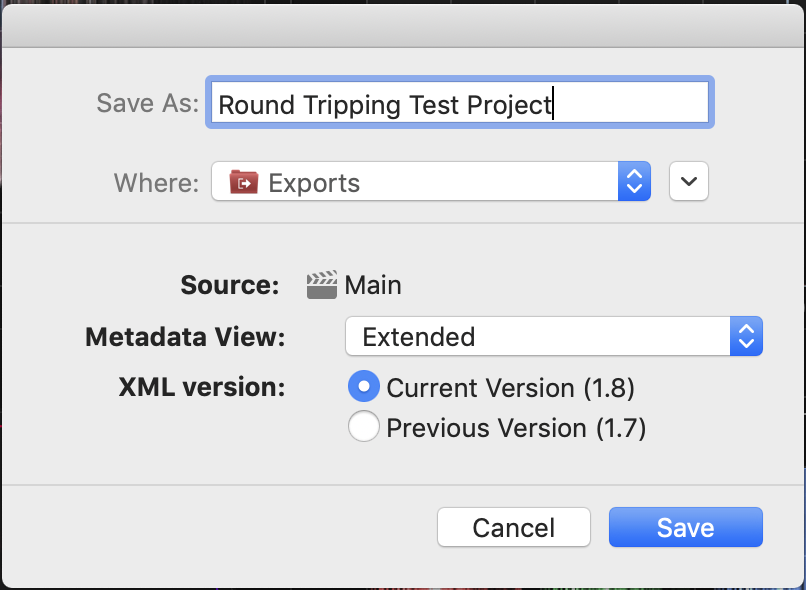
To export an FCPXML of a project, open the project, go to File menu and choose Export XML.... to open the export dialog box. Select a location to export to and hit Save. Exporting an XML in the current version will generally be the the most reliable, but if you run into bugs, switching to the previous version may solve some issues.
Next, open Resolve and create a new project. Open the File menu and select Import Timeline > Import AAF, EDL, XML… to open the import dialog. Find and select your FCPXML file and choose Open. The Load XML… window will appear, offering several options for the import:

Choose your settings and click Okay. Resolve will open the new timeline
If Resolve can’t locate the media, select all the clips from the media pool, right click and choose Relink Selected Clips…

Then, locate the folder or library where your media is stored and hit Okay. If everything went well, your project should open and you’re ready to grade.
Several improvements have been made in recent years regarding what will and will not transfer when roundtripping to Resolve. Previously, things like time remaps and crossfades might not have translated properly, meaning they would need to be baked in before exporting the XML. Below is a list of some things that do and do not transfer when using FCPXML to send a project from from Final Cut 10 to Resolve:
Will Transfer:
Crossfades
Time Remaps
Opacity keyframes
Color adjustments made in the Final Cut color board
Opacity changes, both those made with the fade handles and those manually made with keyframes
Compound clips (Can be manipulated by right clicking the clip in the timeline and choosing the Decompose in Place option)
Position, rotation and scale transformations (It’s still generally a good idea to check these anyway)
Will NOT Transfer:
Color adjustments made outside the color board (Color wheels, color curves and hue/saturation curves)
Most graphics made inside Final Cut
Apple Motion templates
Masks
Effects
Generators (Will be replaced with a blank dummy generator)
Transitions beyond the basic crossfade
In the past, roundtripping to Resolve from almost any NLE has been a slightly thorny subject, but Final Cut has managed to step up their game significantly and make this process overall much smoother than it has been before, making it much easier to use Resolve for smaller projects with a short deadline.
For a great introduction to Resolve’s color grading tools, check out this tutorial series: https://www.youtube.com/watch?v=8Pt5lS9zaTI&list=PLOVqmUlWq2N-jVR-1NuyH61OYvNEDWsqK
Thanks for reading. In Part 2, we will look at best practices for bringing the project back into FCPX, from Davinci Resolve 15.
If you have any comments about this article, or if you would like us to cover another topic in another video, please share with us below.